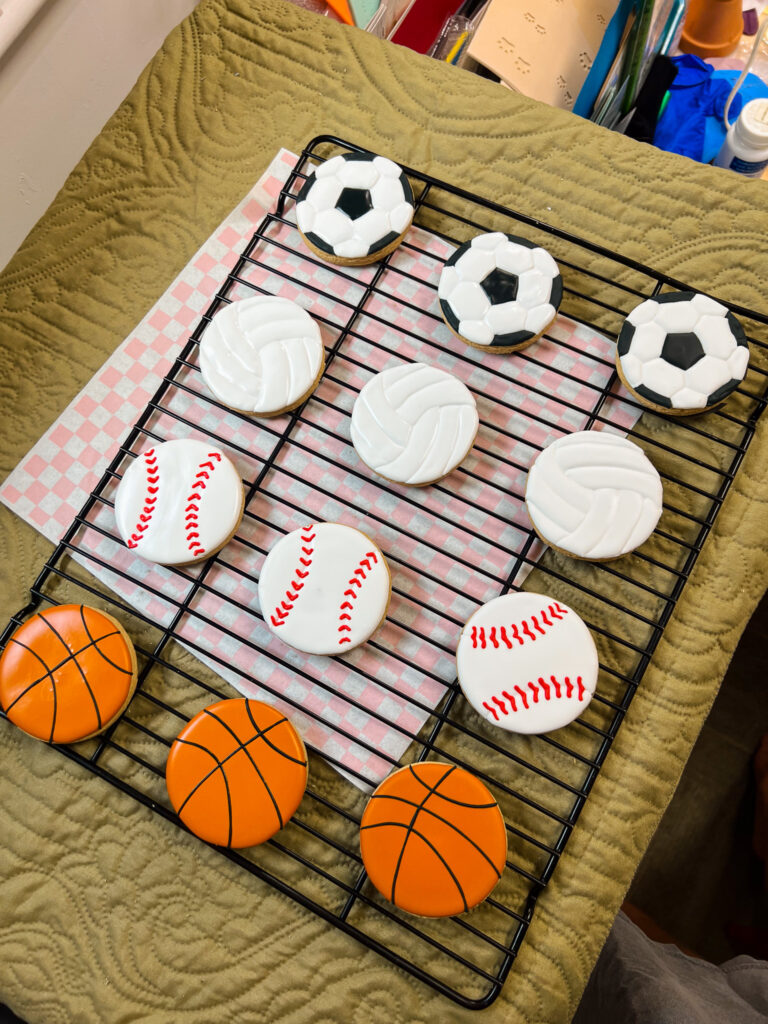
I’ve always loved cookies that bring a little fun and personality to the table, and this month I wanted to create something that felt approachable, sporty, and inclusive. That’s how the Quick & Cute Sports-Themed Cookie Set was born, featuring basketball, soccer ball, volleyball, and baseball designs.
Sports are a classic crowd-pleaser, and I wanted to pick balls that are simple to decorate but still recognizable—and that both genders play (with the slight exception of baseball, which I actually played when I was 8, so that makes it a crossover, right?).
I kept it simple on purpose. Basketball, soccer, volleyball, and baseball are iconic and visually distinct, which makes them perfect for a beginner-friendly set. Plus, these sports have a wide appeal and show up at all kinds of celebrations—from birthday parties to game day hangouts. And they use two colors per cookie, with two cookies requiring their own special color. Less color mixing? Yes, please.
I was honestly expecting the basketball lines to be the trickiest part of this set. I even toyed with the idea of blocking off sections like you do on the baseball, volleyball, and soccer ball cookies to make the piping easier. But once I laid down a smooth burnt orange base and piped the black lines on top, the clean look totally won me over.
The baseball stitching ended up being the real challenge. I tried piping all the stitches at once and it got blobby fast (can you tell which baseball I’m referring to above?). Doing one half of the stitching at a time made everything so much neater and less stressful.
For the soccer ball, I used a printable template and an edible pen to get those pentagons and hexagons just right.
Pro tip: draw the pattern lightly on your cookie with an edible pen first so you can make adjustments before piping. Also, letting each section crust over before moving on helped keep everything crisp and clean.
Supplies
– Gel food coloring: white, black, red, yellow, blue
– Toothpick or scribe tool
– Edible pen/marker
– 4 (or more) tipless piping bags (and scissors to cut them)
Key Takeaways
- Using a soccer ball template was a total gamechanger, but next time I’d trim a little more off the sides—the black and white sections felt a bit unbalanced there.
- The basketball lines felt so satisfying to pipe, if you know you know. Before piping, practice on a paper towel and get comfortable letting the icing flow out smoothly. If you keep getting blobs at the tip, ease up on the pressure or cut a smaller hole in your piping bag. Don’t hesitate to re-bag your black icing – it can really help!
- Don’t try to pipe all the baseball stitches at once. Doing one half at a time keeps your lines neat and avoids blobbing.
If you’re looking for a fun, beginner-friendly project that’s perfect for game day or just flexing your piping skills, this set has you covered. Grab your piping bags, watch the tutorial, and let’s get decorating!

