
Some cookie sets come from a request, some come from a seasonal trend, this set started with an Instagram post I saved years ago. It said “hot girls shop small” and used beads to spell it out. I wanted to recreate that energy in a more classic cross stitch format and I had the whole phrase planned and everything.
And then I forgot to include it. It’s not in the set. Moving on.
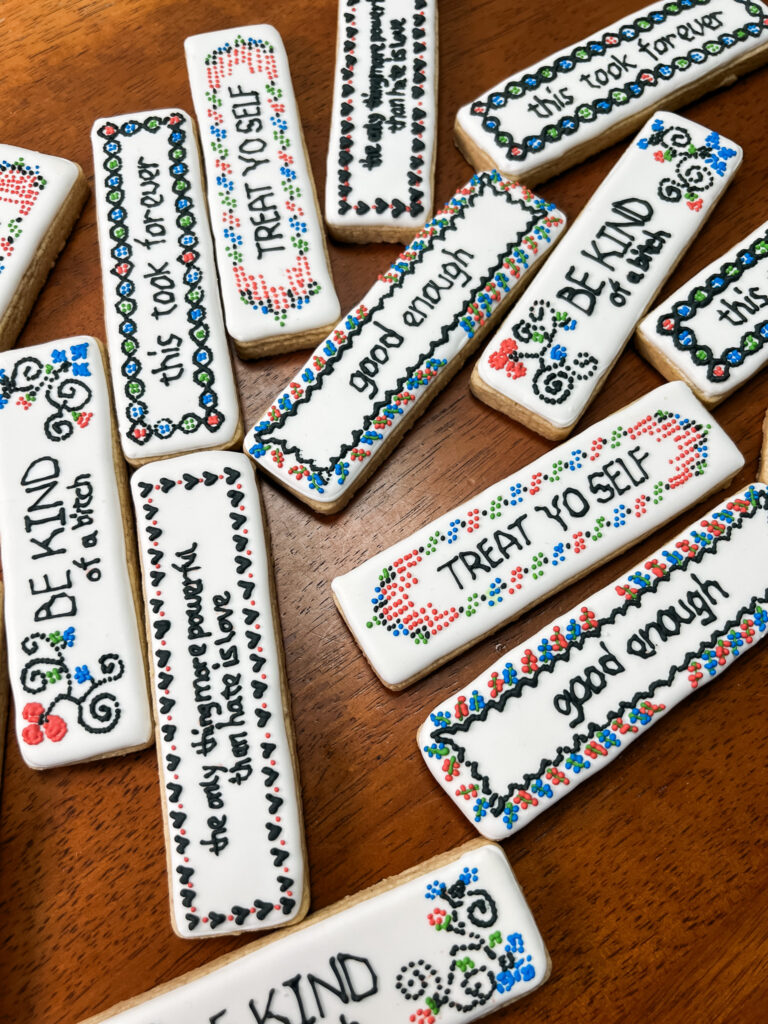
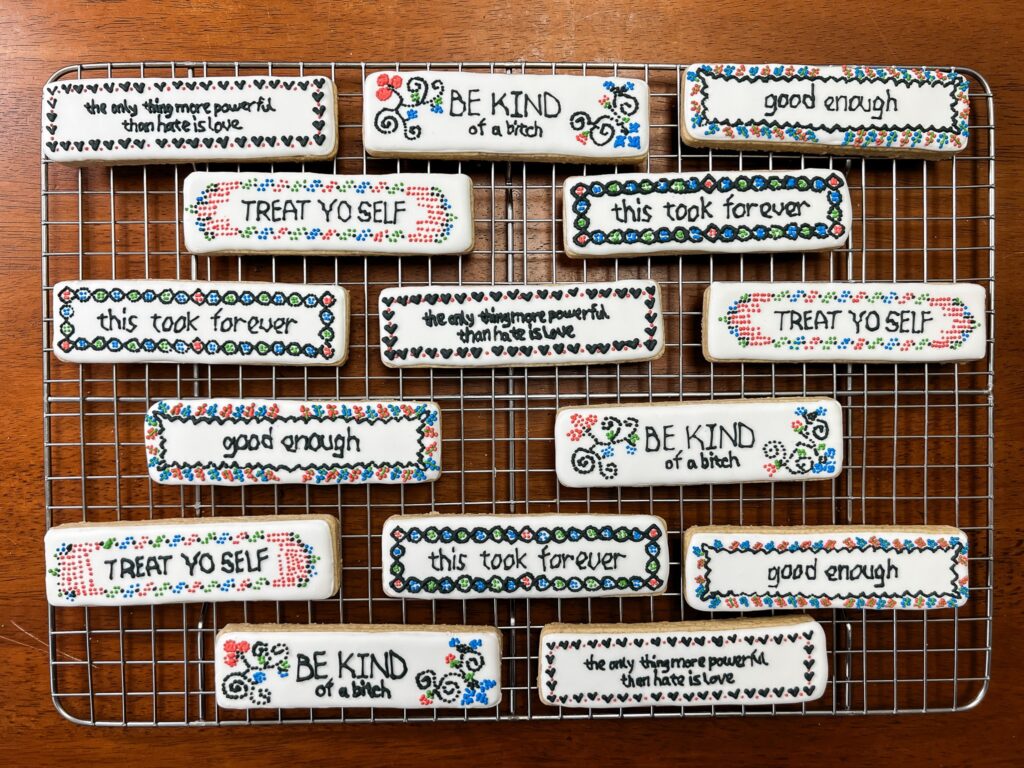
This set includes five designs, all on skinny rectangle cookies: good enough, be kind of a bitch, this took forever, the only thing more powerful than hate is love, and treat yo self.
The Zen Factor
Here’s what you need to know going into this set: it takes a while. About 20 minutes per cookie from start to finish.
Put on that audiobook you’ve been wanting to listen to and do something that feels almost meditative. The cross stitch work is repetitive in the best possible way: small, deliberate dots and lines. You should not rush this one and you should not try to.
I was a little out of practice with fine detail work going into this set and the perfectionist in me nearly came out to rage. About a third of the way through my first cookie – “good enough” – I was convinced it looked like trash and was going to be the literal embodiment of its own phrase. But, by the time I finished it, I was really happy with how it turned out. Just know, it comes together!
No Projector Needed Cookie Design
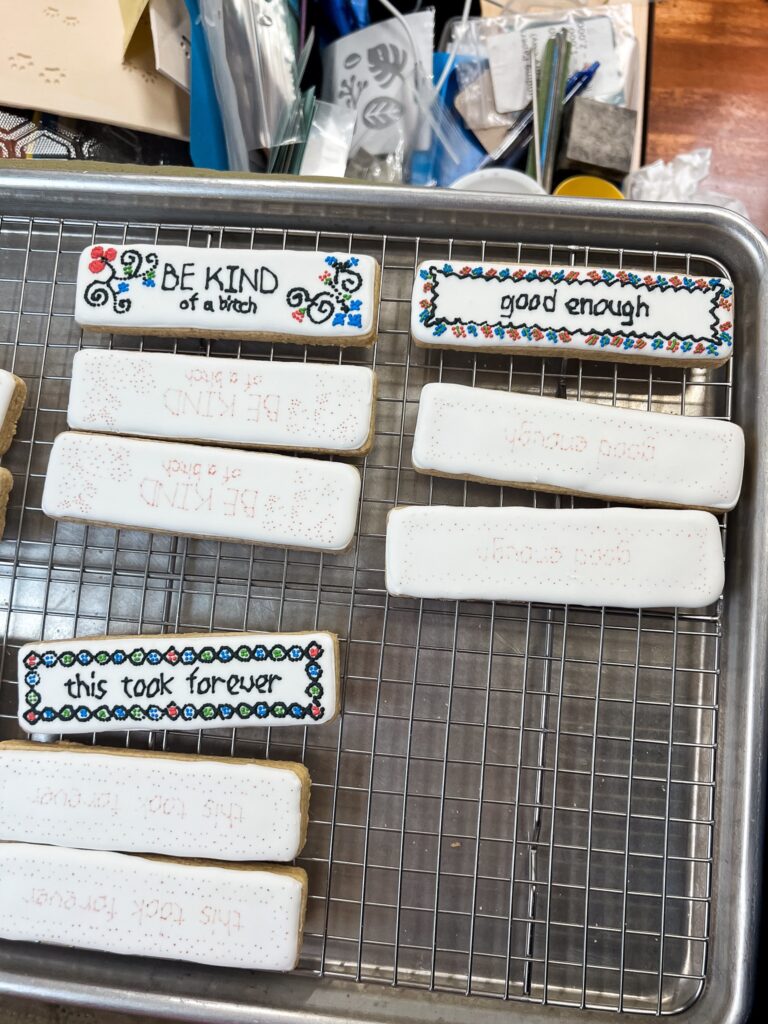
This is the first set where I use a tissue paper transfer technique and it works better than you’d expect. I learned it from a Megan Warne class, she is insanely talented and I highly recommend looking her up.
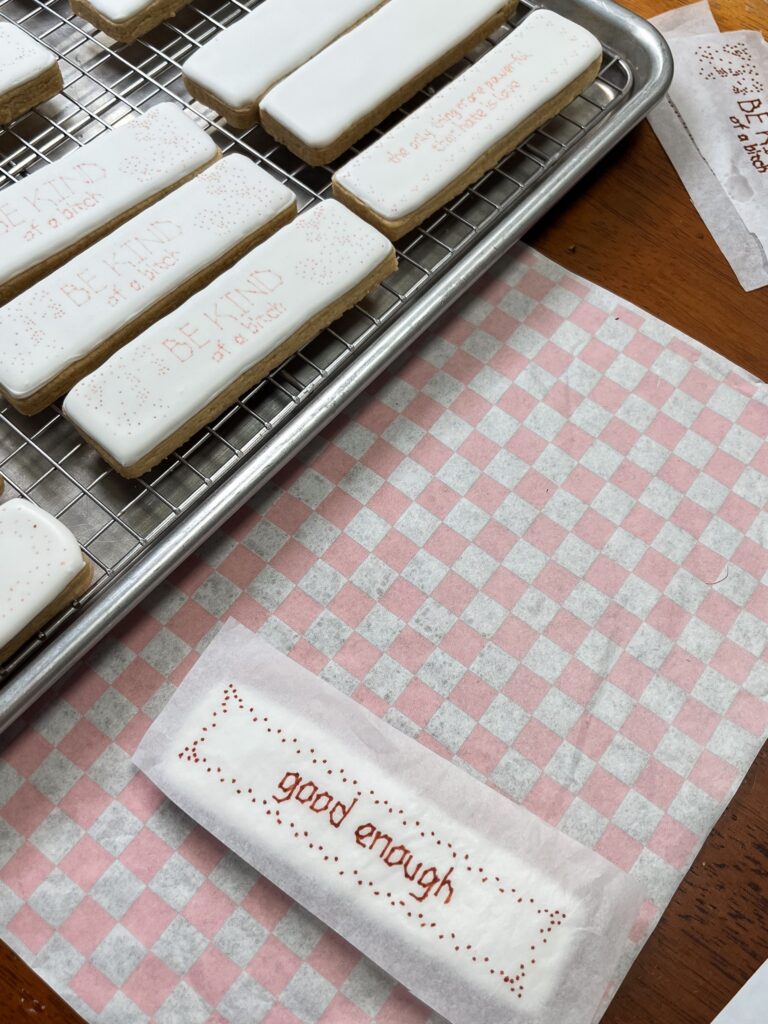
To use it, you trace your design from your iPad, phone, or printed paper onto white tissue paper using a (ultra) fine tip edible pen. Place that tissue paper onto your completely dried icing and trace over the design again. The pressure transfers the design onto the cookie surface and gives you a guide to pipe over instead of freestyling the lettering directly onto the cookie or needing a projector.
For a set built entirely around words and fine detail work, this technique gets you the detail without the extra equipment.
Supplies
- Brown sugar cookie base
- Royal icing in two consistencies: hybrid (for the base) and detail/line (for the cross stitch work) follow along with my coloring and consistency video here: https://youtu.be/gCGaPgN_lL0
- Icing colors: white, red, green, blue, black
- Tipless piping bags
- Toothpick or scribe tool
- White tissue paper
- Fine tip edible pen (non-negotiable, it needs to be fine tip). Already have a black one? Use it. If not, grab a colored pack like these: https://a.co/d/07gRDa0R
- Skinny rectangle cookie cutter, I use the 6 multi cutter from Cookie Countess which cuts 6 at a time
My Decorating Order Recommendation
Decorate these cookies in this order and the whole process will go smoothly:
- Flood the base of all the cookies you are going to decorate. They need to fully dry at least 8 hours before you can move on. This is REQUIRED or you will break through your icing transferring your design.
- Trace every design for each cookie onto white tissue paper using a fine tip edible pen.
- Center that tissue paper on each cookie and trace over the design again to transfer it onto the dried icing.
- Decorate each cookie following your transferred guide
Okay, the steps were pretty straightforward this time around.
Key Takeaways
- The tissue paper transfer technique works so well. It feels a lil tedious, but it actually goes by quickly.
- Fine tip edible pens are non-negotiable for this set. The fine tip allows you the get the details without leaving too much ink on the cookie. I keep saying fine tip because that’s what I think of them, but they are actually “ultra fine tip” – the pointy metal end pens.
- Takes about 20 minutes per cookie to fully decorate. Probably longer…
- Trust the process! It might look messy midway, but that’s because it’s not done yet!
This is the kind of set that reminds you why you picked up this hobby in the first place. Not because it is fast or easy or impressive at a glance but because you can lock in and get lost in the design.
Download the free guide and let’s make some cross stitch cookies together!